What is Zoom Whitening Home Kit
The Zoom Whitening Home Kit is a popular at-home teeth whitening system designed to brighten your smile conveniently. It’s a professional-grade treatment you can apply in the comfort of your own home, offering a more affordable alternative to in-office procedures. This kit usually includes a whitening gel with a high concentration of hydrogen peroxide, custom-fit trays, and often a special activating light to accelerate the whitening process. The kit’s primary goal is to lift stains and discoloration caused by coffee, tea, tobacco, and other lifestyle factors, resulting in visibly whiter teeth. Unlike over-the-counter whitening strips or toothpastes, the Zoom kit delivers stronger results due to its professional formulation. However, the effectiveness of the kit can vary depending on the individual’s teeth and the severity of the staining. Always consult a dentist before starting any whitening treatment to ensure it is appropriate for your oral health and expectations.
Components of the Zoom Whitening Kit
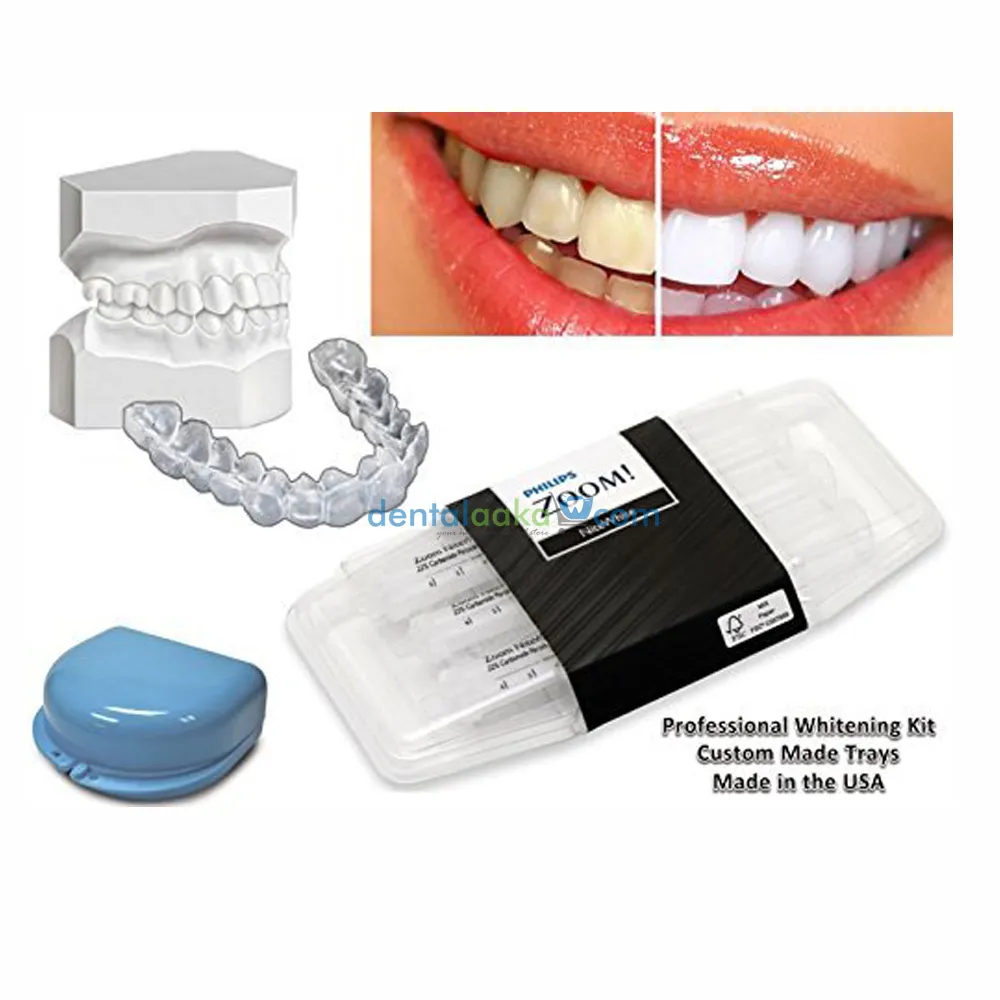
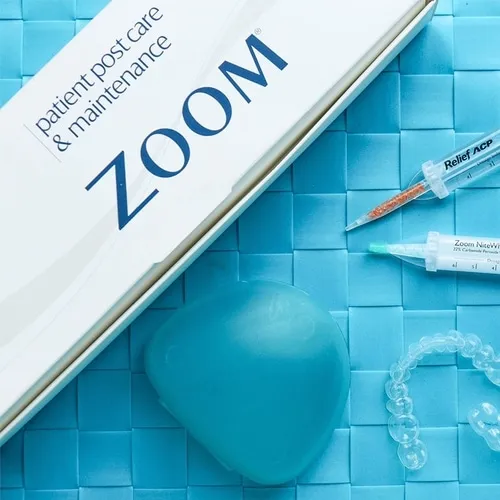
Understanding the components of the Zoom Whitening Home Kit is crucial for a successful whitening experience. Typically, the kit contains custom-fitted trays, which are designed to precisely fit your teeth and hold the whitening gel in place. These trays are often created by a dentist based on impressions of your teeth, ensuring a perfect fit for optimal gel contact and to minimize gel leakage onto the gums. The whitening gel itself is the key active ingredient, usually containing a high percentage of hydrogen peroxide to effectively bleach the tooth enamel. The kit will usually include a special light designed to enhance the whitening action, accelerating the process. This light, combined with the gel, helps to break down stain molecules within the teeth. You’ll also find detailed instructions, usually along with a shade guide to help you track your progress. Make sure the kit is complete with all components prior to starting any procedure. This helps achieve desired outcomes.
Step 1 Preparing for Zoom Whitening

Before you begin your Zoom Whitening treatment, proper preparation is essential to ensure effectiveness and minimize any potential side effects. First, thoroughly brush and floss your teeth to remove any food particles and plaque. This allows the whitening gel to come into direct contact with the tooth surfaces. Avoid using toothpaste with whitening agents or abrasive ingredients before applying the Zoom gel, as they can cause sensitivity. Inspect your custom-fitted trays to ensure they are clean and free of any damage. If you have any existing dental work such as fillings or crowns, be aware that the whitening process will not affect the color of these restorations. Before applying the gel, it’s advisable to apply a thin layer of petroleum jelly or a similar protectant to your gums, lips, and any sensitive areas to prevent irritation from the whitening gel. Careful preparation sets the stage for a comfortable and effective whitening experience, leading to the best possible results.
Step 2 Applying the Whitening Gel
Once you’ve prepared your mouth, carefully apply the Zoom Whitening gel into the custom-fit trays. Use the amount of gel recommended in the instructions, typically a small bead or line along the inner surface of each tray. Avoid overfilling the trays, as this can cause the gel to leak and irritate your gums. Insert the trays into your mouth, ensuring they fit snugly over your teeth. Gently press the trays against your teeth to ensure the gel is evenly distributed. Follow the time guidelines specified in your kit’s instructions. The recommended wear time can vary depending on the concentration of the gel and your dentist’s recommendations. While the trays are in place, try to avoid swallowing excess saliva; you can gently spit it out. After the recommended time, remove the trays and rinse your mouth thoroughly with water to remove any remaining gel. Brushing your teeth again after the whitening process is advisable to clean away any residue and refresh your mouth.
Step 3 Using the Zoom Whitening Light
Some Zoom Whitening kits include a special light that is designed to accelerate the whitening process. If your kit contains one, position the light according to the instructions. Usually, you will place the light near your mouth, ensuring it is focused on your teeth. The light emits a specific wavelength that helps to activate the whitening gel, causing it to break down stain molecules more efficiently. Follow the recommended usage time specified in the kit’s instructions; this is essential to ensure you don’t over-expose your teeth. The light is often used in intervals, and you’ll need to repeat the gel application and light exposure a few times during a single whitening session. Keep your mouth slightly open to allow the light to reach all your teeth. After each light session, take a moment to assess your comfort level and check for any signs of sensitivity. Regular usage of the light combined with the gel will boost the overall results of your whitening procedure.
Step 4 Cleaning Up After Whitening

Proper cleaning after each Zoom Whitening session is vital for maintaining your oral hygiene and preventing any adverse effects. After removing the trays and rinsing your mouth, thoroughly clean the trays with cool water and a soft toothbrush to remove all traces of the whitening gel. Avoid using hot water, as it can warp the trays. Dry the trays completely before storing them in a safe place away from direct sunlight and heat. It is also advisable to brush your teeth gently after the whitening treatment with a toothpaste that is designed for sensitive teeth, this helps to minimize any potential sensitivity. Rinse your mouth thoroughly with water to ensure all gel residue is removed. Follow the instructions in the kit to remove all of the used products. Cleaning up properly will help ensure the longevity of the whitening effect and maintain the health of your teeth and gums.
Step 5 Maintaining Your White Smile
After achieving your desired level of whiteness with the Zoom Whitening kit, it’s essential to take steps to maintain your bright smile. Avoid or reduce your consumption of staining foods and beverages like coffee, tea, red wine, and dark-colored juices. If you do consume these items, rinse your mouth with water immediately afterward. Regular dental check-ups and cleanings are crucial for removing any surface stains and maintaining overall oral health. Brush your teeth twice a day with a whitening toothpaste to help remove any new stains and keep your teeth looking bright. You might also consider using an at-home maintenance kit or touch-up treatments to keep your smile white. Maintaining your white smile includes a good oral hygiene routine and healthy eating habits. Remember to always follow your dentist’s recommendations for long-term oral health and teeth whitening maintenance.
Potential Side Effects of Zoom Whitening
While Zoom Whitening is generally safe, it can cause some temporary side effects. The most common side effect is tooth sensitivity. This usually occurs during the whitening process and can last for a few days afterward. If you experience sensitivity, use toothpaste designed for sensitive teeth or avoid very hot or cold foods and drinks. Gum irritation is another potential side effect, which can occur if the whitening gel comes into contact with your gums. To minimize this, make sure the trays fit your teeth properly, and apply a protective barrier like petroleum jelly to your gums. If you experience significant discomfort or pain, stop the treatment and consult your dentist. In rare cases, some people may experience a mild allergic reaction. Consulting your dentist prior to starting the procedure can minimize potential side effects. Understanding the potential side effects and taking necessary precautions will help you have a more comfortable and positive whitening experience.
